
10 Small Kitchen Cabinet Organization Ideas That Double Your Storage
If your kitchen cabinets feel like a game of Tetris you keep losing, you are not alone. I spent years opening cabinet doors and watching things fall out. Then I started making small, intentional changes, and the difference was immediate.
These 10 ideas genuinely work, even in the tiniest kitchens.
1. Use a Tension Rod to Hang Spray Bottles
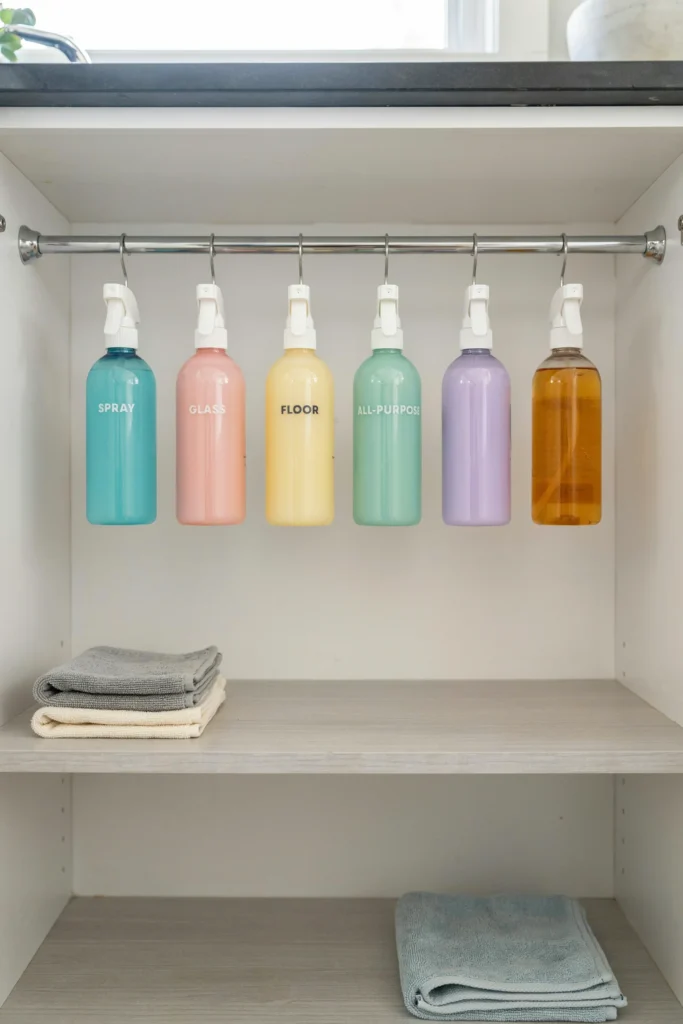
This one changed my life under the sink. I installed a simple tension rod horizontally inside the cabinet, and now all my spray bottles hang from their triggers. The floor of the cabinet is completely free for other things.
Why it works:
- Spray bottles no longer tip over or block access to items behind them
- You can see everything at a glance
- It costs less than five dollars and takes two minutes to install
Look for an adjustable tension rod at any hardware or home goods store. Curtain rods work just as well.
2. Stack Shelves Inside Your Cabinets
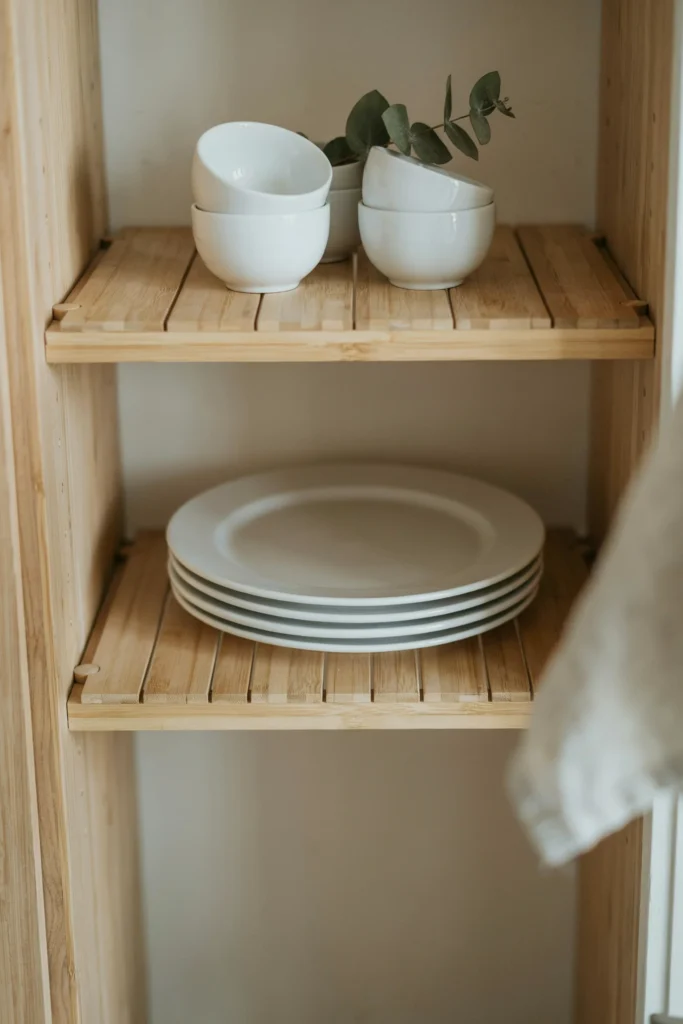
Most kitchen cabinets have way too much vertical space between shelves. A short stack of plates barely reaches the next shelf, and all that air above goes to waste.
Stackable cabinet shelves sit right on your existing shelf and create a second level. I use them in my upper cabinets for plates and mugs, and I doubled what I can store without adding a single cabinet.
What to store on two-level shelving:
- Plates on the bottom, smaller bowls on the raised shelf above
- Mugs on the bottom tier, lids or small containers on top
- Canned goods on the lower shelf, spice jars on the riser
Wire and bamboo versions both work great. Go for bamboo if you want something that looks clean and intentional.
3. Mount a Pegboard Inside Cabinet Doors
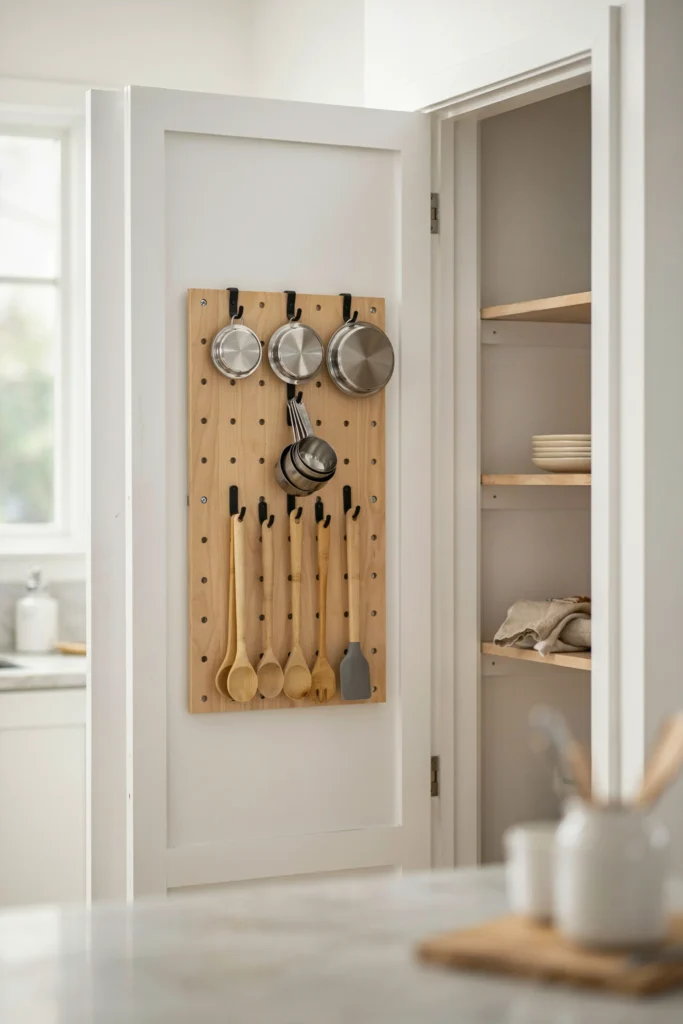
The inside of a cabinet door is prime real estate that most people ignore. A small pegboard panel attached to the inside of a door holds pot lids, measuring cups, cutting boards, or small tools.
I did this on my largest cabinet door and freed up an entire shelf in the process. You can customize the peg layout based on exactly what you need to hang.
Items that hang well on cabinet door pegboards:
- Pot and pan lids
- Measuring cups and spoons
- Oven mitts
- Small colanders
- Flat graters
Make sure you leave enough clearance so the door can close without the pegboard hitting the shelf inside.
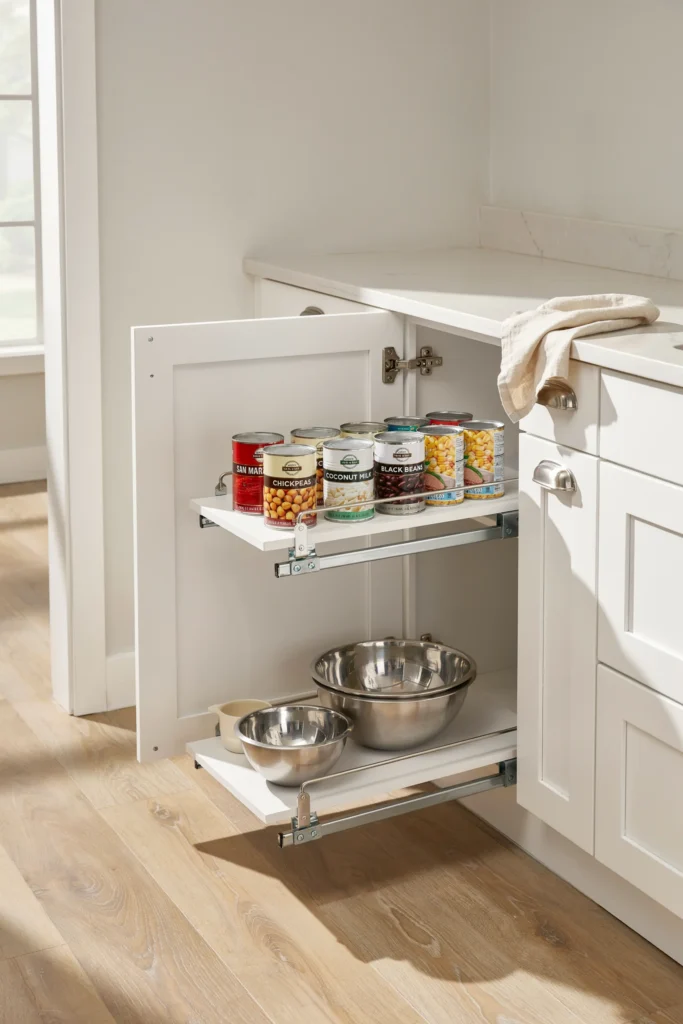
4. Install Pull-Out Drawer Organizers
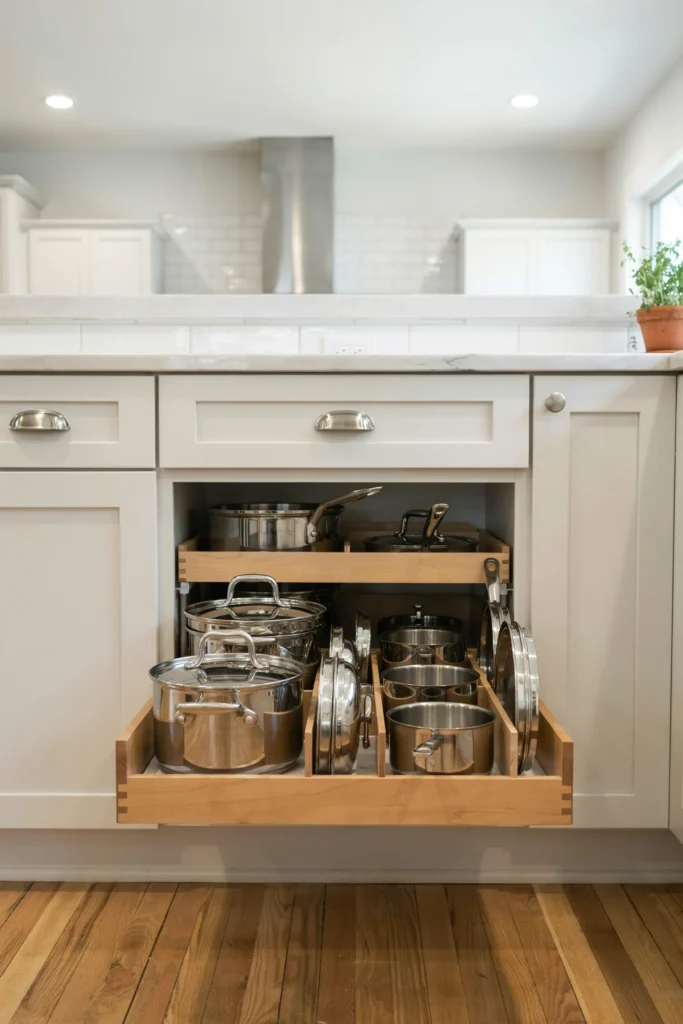
Deep cabinets are a trap. Whatever you put at the back gets forgotten. A pull-out drawer organizer slides the whole contents forward so you can actually reach things without unpacking everything in front.
These are especially useful in lower cabinets where pots, pans, and heavy appliances live. You pull the drawer out, grab what you need, and slide it back.
Best uses for pull-out organizers:
- Pots and pans stored by size
- Mixing bowls nested together
- Small appliances you use weekly but not daily
- Cleaning supplies under the sink
Full-extension slides matter here. Make sure the organizer you buy extends all the way out.
See Also: 16 Small Kitchen Organization Ideas That Maximize Every Inch
5. Sort Spices in a Tiered Spice Rack
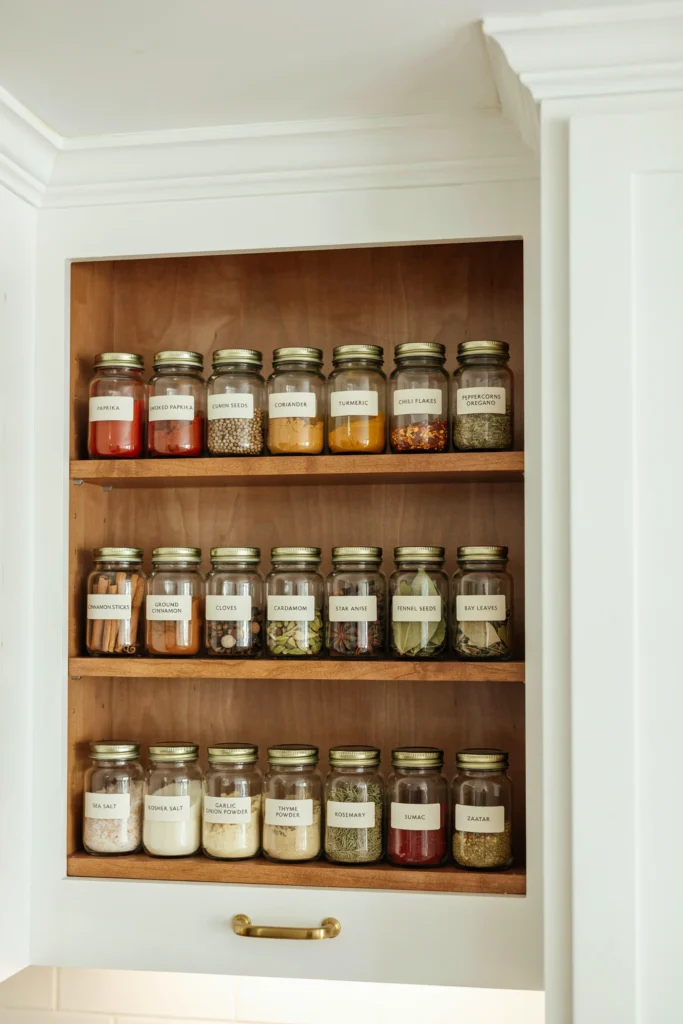
A flat shelf of spice jars means you are always moving five jars to find the one you want. A tiered rack raises the back rows so every jar is visible at the same time.
I switched to a three-tier spice rack inside my upper cabinet and now I can see every single spice without touching any of them. It sounds small but it saves real time every single day.
Options for tiered spice storage:
- Freestanding tiered racks that sit on your cabinet shelf
- Magnetic spice tins that stick to a metal strip mounted on the inside door
- Lazy Susans that spin so every spice rotates to the front
If you go the lazy Susan route, choose one with tall enough walls so jars do not slide off when it spins.
6. Use Drawer Dividers for Utensil Drawers
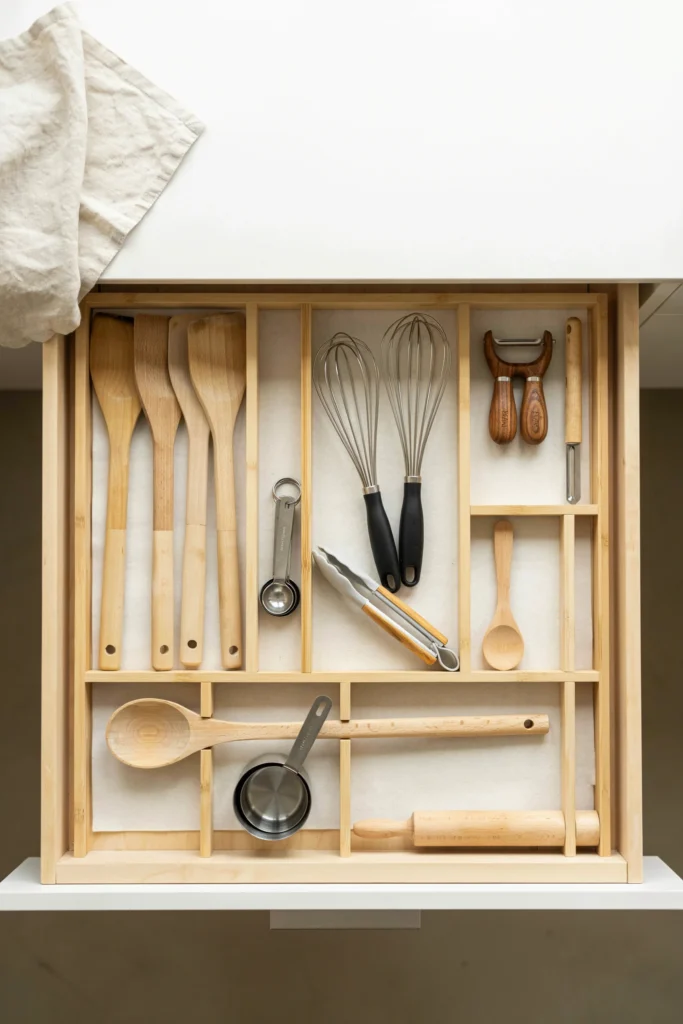
An unorganized utensil drawer is one of the most frustrating things in a kitchen. Everything slides around, and finding a spatula takes longer than it should.
Adjustable drawer dividers let you customize the compartments based on what you actually own. You can make one big section for large spoons and ladles, and smaller sections for peelers, zesters, and whisks.
What to separate in your utensil drawer:
- Cooking utensils by size and use
- Measuring spoons clipped together on a ring
- Vegetable peelers, zesters, and can openers in their own section
- Silicone spatulas laid flat in a long section
The adjustable kind beats the fixed insert every time because your drawer contents will change over the years.
7. Hang a Pot Rack on the Cabinet Exterior or Wall
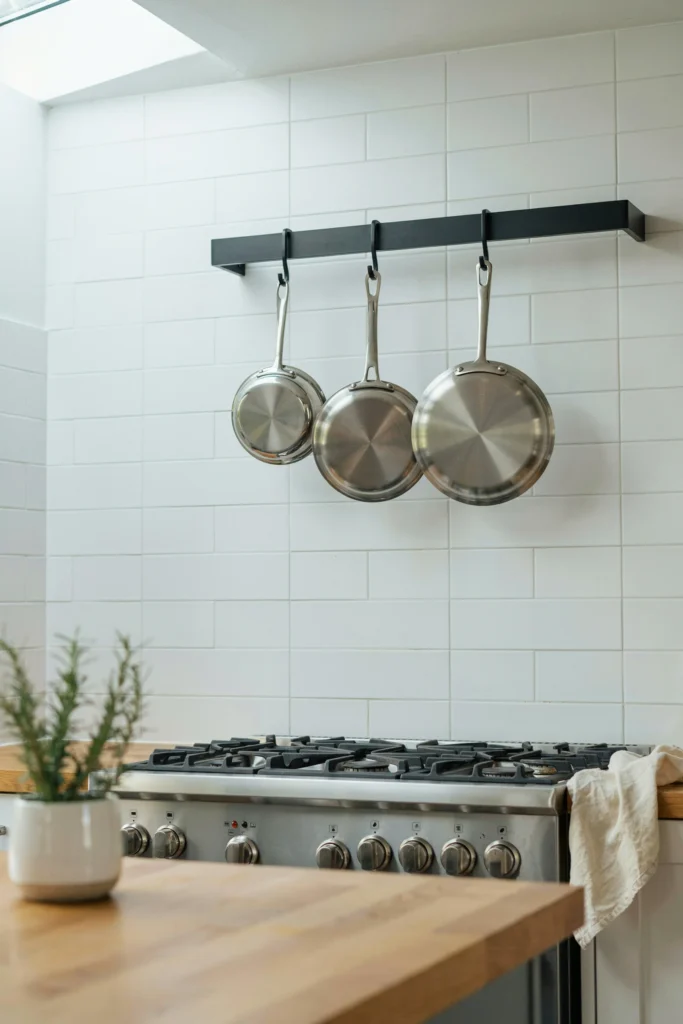
Sometimes the best move is to take things out of the cabinet entirely. A mounted pot rack frees up enormous cabinet space, and it looks intentional rather than cluttered.
I hung a simple horizontal bar with hooks above my stove. My three most-used pans live there now, and the cabinet that used to hold them is free for dry goods.
Pot rack styles to consider:
- Ceiling-mounted round rack if you have the height
- Wall-mounted horizontal bar for a smaller collection
- Over-the-door rack that hangs from the top of a cabinet door
- Pegboard wall with S-hooks for maximum flexibility
Make sure whatever you mount is anchored into a stud or the appropriate wall anchor for the weight.
8. Add a Pull-Out Corner Cabinet Solution
Corner cabinets are the most wasted space in any kitchen. Lazy Susans help but still leave blind spots. A pull-out solution, sometimes called a magic corner or a swing-out shelf system, brings everything forward and into view.
If you are not doing a full renovation, a standalone corner carousel shelf is an affordable fix that works well for canned goods and jars.
What to store in reorganized corner cabinets:
- Canned and dry goods organized by type
- Mixing bowls nested inside each other
- Small appliances used occasionally
- Baking supplies like muffin tins and loaf pans
Label the shelves if multiple people use the kitchen. It keeps the system alive.
See Also: 9 Modern Minimalist Kitchen Ideas for a Sleek Home
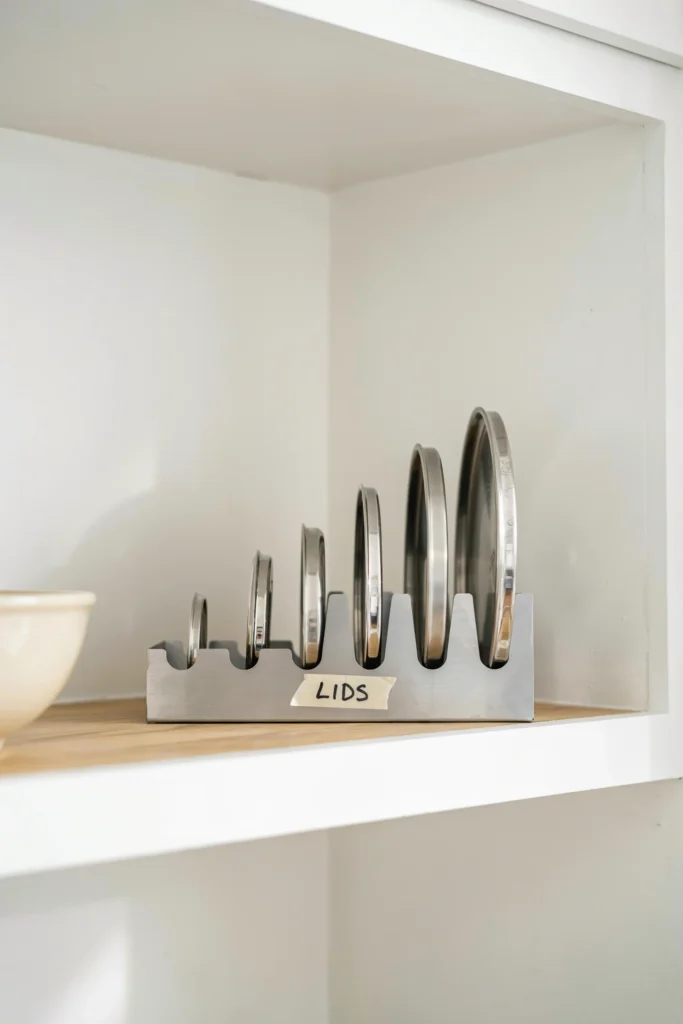
9. Store Lids Vertically Using a File Organizer
Pot lids are awkward because they never stack neatly. A metal file organizer, the kind meant for papers and folders, works perfectly as a vertical lid holder.
Set one inside a lower cabinet and slot your lids in like files. They stay upright, they are easy to grab, and they stop knocking into everything else.
Lid storage options that work:
- A repurposed metal file organizer ($5 to $10 from an office supply store)
- A DIY tension rod lid rack using two vertical rods
- A dedicated lid organizer rack sold specifically for this purpose
Match the dividers to the sizes of your lids for the cleanest result.
10. Label Everything After You Organize
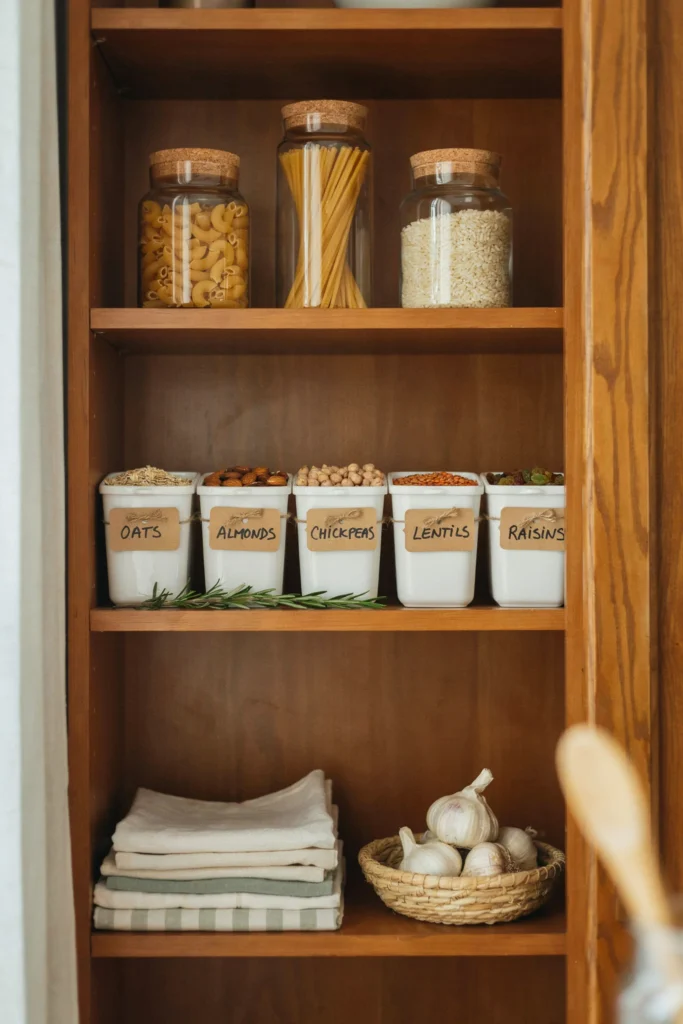
This is the step most people skip, and it is the reason most organized kitchens slowly drift back into chaos. Labels make a system stick.
When every shelf and bin has a label, it takes five seconds to put something away in the right place. It also helps everyone in the household follow the same system without being told.
Labeling options by style:
- Printed labels on a label maker for a clean, uniform look
- Chalkboard labels with chalk markers for a softer, adjustable option
- Clear adhesive labels you can write on with a permanent marker
- Wooden tags with leather cord ties for a natural aesthetic
Label the shelf or bin, not the item. That way the system works regardless of what brand or size you buy next time.
Final Thoughts
You do not need a bigger kitchen. You need a smarter one. Start with one or two of these ideas, the ones that solve your most frustrating daily problem, and build from there. Small changes stack up quickly, and before long you will open your cabinets without dreading what falls out.
The kitchen is the most used room in most homes. It deserves a setup that actually works for you.